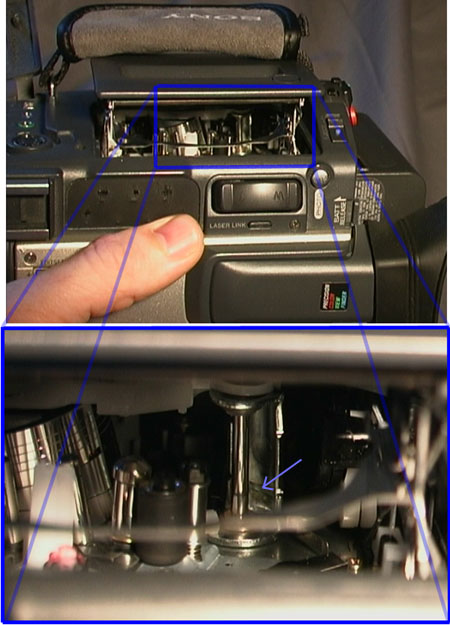
A. INSPECT: Open the tape compartment and look inside, as shown in the images below. Toward the back end of the camera is a metal cylinder, the capstan. This drives the tape during record and playback. In operation, the tape is squeezed between the capstan and the larger diameter rubber pinch roller (down and to the left in the photo- see also tape path illustration and this cleaning page). The blue arrow points to a dark ring at the bottom end of the capstan, which if present, can and eventually will cause a problem. You can have the camera professionally cleaned, or if you are confident of your skills, you can clean it yourself in a few minutes as described below. Note; if you have doubts, and your warranty is still valid, feel free not to do this yourself. (my camera is out of warranty, and besides I'm impatient).

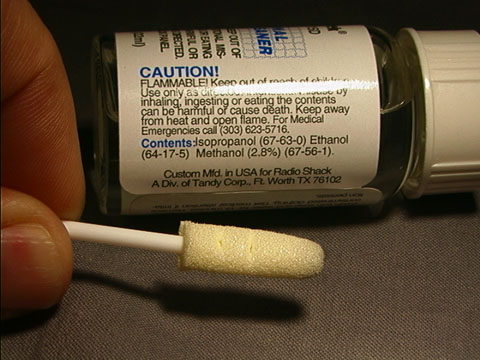
B. CLEAN: If you observe such a ring of gunk buildup on your camera, here's what to do. First, arm yourself with alcohol or special no-residue cleaning solution, and a lint-free chamois or foam-tipped swab, or other small cleaning tool as shown here. I used Radio Shack "Mini Foam Swabs (pkg.10)", RS#44-1001 along with "Professional Tape Head Cleaner" solution, RS#44-1115D (which according to the label is just a mixture of alcohols). Some people recommend cotton swabs, but be extra careful not to leave any cotton threads or lint behind in the mechanism, if you use those. Note, this page just describes my own procedure; a general cleaning approach from a more experienced technician is described here.

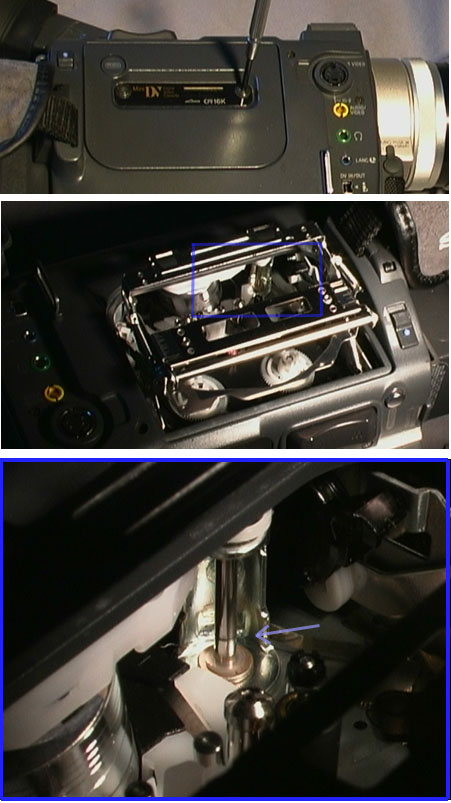
Make sure you have good light on your work surface. I used my kitchen table covered with a clean sheet. It is possible to clean the capstan without taking the tape door off, but it's easer if you do remove it. Just unscrew the two screws, and put them someplace safe! Lift the tape door off and inspect the mechanism (see below).

The blue arrow again points to the brownish ring of gunk, which being somewhat sticky can grab the tape and cause havoc. A foam swab moistened with the alcohol solution removed it very easily. By turning a foam swab inserted between the capstan and the metal part behind it, I was able to rotate the capstan shaft slightly and thus clean all around it. I also noticed a small fabric thread had somehow fallen into the tape compartment, which I removed with non-magnetic tweezers (don't get anything magnetic near the tape head drum, the large grooved cylinder at the left in the photo above).
After cleaning the capstan and any of the tape guides which aren't
sparkling
clean, give the area some puffs with a lens duster-bulb or can of
compressed air.
This evaporates any alcohol, and disperses any dust. Check again that
there
is no lint or dust left inside, and replace the tape door. It has two
tabs
which fit into the metal bracket on the lower side (toward the bottom
surface
of the camera). Note, when you seat the screws firmly the tape door
will
still seem loose and it can be rattled slightly. This is normal,
believe
it or not. Now you're done! Go forth and shoot video.
Back to TRV900 Cleaning and Maintenance