Barrett's TRV900 microphone replacement procedure
You'll need:
1: A good #0 Phillips screwdriver - check that it fits snugly in the screws, cheap drivers don't fit well. There's nothing worse than a $2k camcorder with stripped screws from a 50¢ junk screwdriver.
2: Either a small needle nosed pliers or forceps, preferably with smooth jaws and a bend to the tips.
3. (optional) Scotch tape to hold on the top assembly.
4. Rubbing alcohol and Q-tips.
5. Replacement
mic elements, Sony P/N 141801411, $22.31 each plus $6.95 shipping,
$3.74 tax.
Note: the mic elements can be ordered from Sony
parts.
First, print out the two pages from the service manual that apply, so you'll have them for reference as you work.
First, you have to remove the four screws that hold on what's referred to as the Cabinet (upper) assembly on page 55.
Next, remove the three screws holding on the Front panel assembly (again, refer to page 55). Note what's referred to as "claws" (a) on the diagram. So far all the screws are machine thread, so the only difference is color, not size, length, or thread.
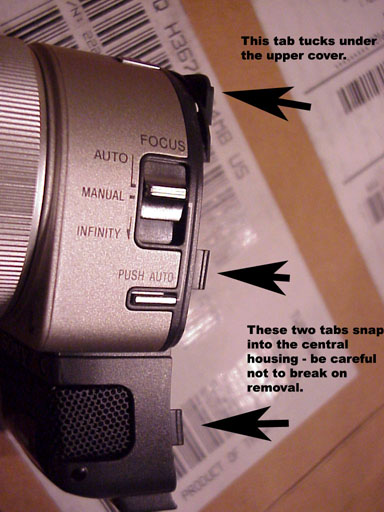
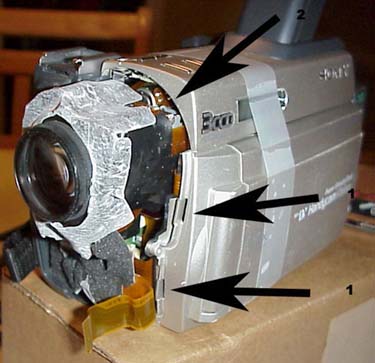
Gently lift the Cabinet assembly up just enough that the lip of the Front panel assembly will clear. No need to disconnect the Mylar ribbon connector to the upper assembly. Pull the Front panel assembly straight forward - you might have to pull at a bit of an angle towards the side the LCD is on to allow those "claws" to pop out. I didn't have any problem, but have heard that some have. Just remember, the lens assembly is inside there, and it's pointed straight ahead. Here's some pictures of what it looks like beneath:

Once you have the assembly free, I used a piece of scotch tape to hold down the upper assembly so it wasn't flopping around. You'll notice there's a Mylar ribbon connector, it has to be disconnected (#1 in next picture). Some electronic boards use a two piece connector for this type of connector, you pry apart the connector and the ribbon slips out easily - but that's not what's used here, it's a one piece connector, it doesn't come apart. Use your pliers or forceps, get a good grip and gently pull the ribbon straight out of the connector. Working one edge a little is ok, just make sure you pull it out evenly. If you're using a tool with serrated jaws, be careful not to slip - the serrations can cut the thin insulation of the ribbon, you don't want that. As you remove it, make a mental note as best you can as to how much of the ribbon is in the connector. You'll need to know that when reassembling to know that the ribbon is properly seated.
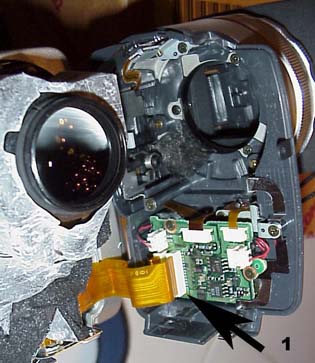
Here's a view of what you'll see once the cover's off - #1 is the "claw" locations, #2 marks where the lip of the front assembly tucks under the upper assembly
Now it's time to disassemble the front assembly. In the same way as before, remove the ribbon connector noted below as #1. Remove both microphone connectors, #2 below. A couple of these next screws are coarse thread for plastic - I'm not sure if they're just these or the next set also, just make a mental note of which are which (do a better job of remembering than I obviously did) and you'll be fine. Remove the two screws, #3. Note the mounting pin, #4 - you have to have it aligned properly upon assembly - it's not so easily noticed on assembly. #5 is an extra arrow, added at no extra charge to you, the consumer. It is of course, also, home of that first ribbon cable you remove, but does there really need to be arrow here? I think not.
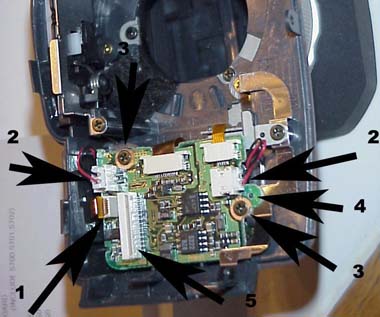
Leave the other two ribbon cables on the top connected, and gently flip the circuit board up out of the way.
Sorry this next picture is blurry, but the arrows show the next two screws to remove.
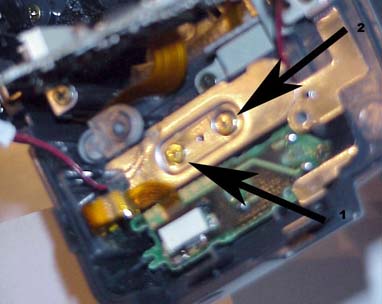
With these screws removed, lift off the yellow zinc chromate plated plate and then pull the microphone assembly shown below free from the front, threading the microphone connector leads out through the holes.
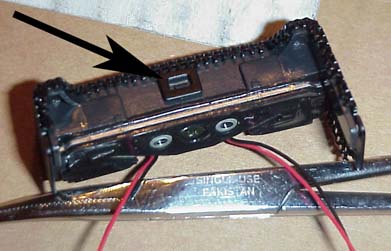
Note the clip that holds the grill in place. here's an exploded look at what's inside:
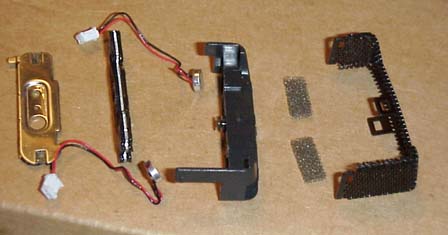
I found a slight oil residue in the rubber pieces the microphones fit into so I cleaned it with Q-tips and rubbing alcohol. (Again, sorry for the out of focus picture.)
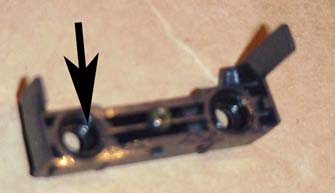
The front assembly housing also had a slight trace of oil on it, clean it also.
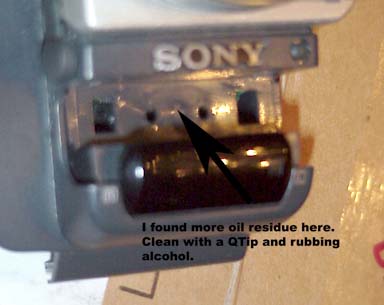
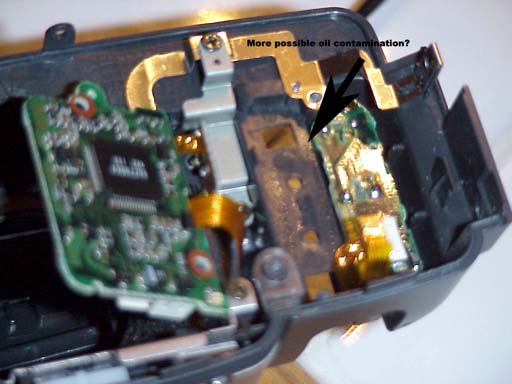
I noticed the new microphones had a different color dot on them - who knows, maybe they're new improved, oil resistant models?
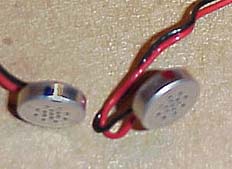
Assembly is pretty much the reverse of disassembly (in fact, the pictures were taken of the assembly). Just make sure you get the microphones properly seated in their rubber mounting rings - if they get where they're not completely isolated by the rings from the mounting piece, I'm sure you'd pick up some noises you wouldn't like. The rings tend to be tricky, I think the rubbing alcohol makes them stickier. To reconnect the Mylar ribbon connectors, firmly grip the connector just above where the exposed contacts are and gently push straight in - the ribbon connector has some sort of stiffener right in that area, it's stiff enough that you can force the ribbon back into the connector.